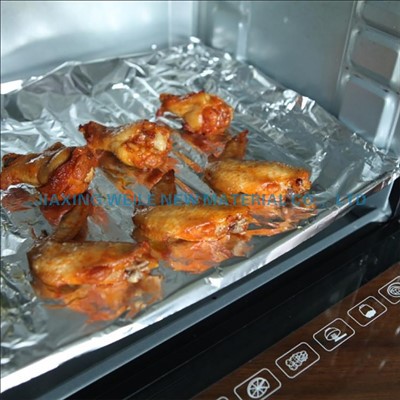
Hey there, fellow bakers and cooking enthusiasts! I'm a supplier of baking paper rolls, and today I'm super excited to share with you all the ins and outs of using a baking paper roll. Whether you're a seasoned pro in the kitchen or just starting out on your baking journey, this handy tool can make your life a whole lot easier.
First things first, let's talk about what a baking paper roll actually is. It's a long, continuous sheet of paper that's specifically designed for use in baking and cooking. You can find it in different sizes, thicknesses, and even colors. Some of our popular options include Standard Baking Paper, Natural Color Food Baking Paper, and High Quality Transparent White Cooking Baking Paper. Each type has its own unique features and benefits, but they all serve the same basic purpose: to make your baking and cooking tasks more convenient and mess-free.
Why Use Baking Paper Rolls?
Before we dive into the how-to part, let's quickly go over why you should consider using a baking paper roll in the first place. Here are some of the major advantages:
- Non-Stick Surface: One of the biggest perks of using baking paper is its non-stick property. This means that your baked goods won't stick to the pan, making them easier to remove and clean up. You won't have to worry about scraping off stubborn bits of cake or cookies from your pans anymore!
- Even Heat Distribution: Baking paper helps to distribute heat evenly across the surface of your pan. This results in more consistent baking, so your treats will come out perfectly cooked all the way through. No more burnt edges or undercooked centers!
- Easy Cleanup: Since the baking paper catches all the drips, spills, and crumbs, cleaning up after baking is a breeze. You can simply throw away the used paper, and your pan will be practically spotless.
- Versatility: Baking paper isn't just for baking. You can also use it for roasting vegetables, steaming fish, or even making parchment paper envelopes for baking en papillote. The possibilities are endless!
How to Choose the Right Baking Paper Roll
When it comes to choosing a baking paper roll, there are a few things you need to keep in mind. Here are some factors to consider:
- Size: Baking paper rolls come in various widths and lengths. Make sure to choose a size that's appropriate for the pans and dishes you'll be using. If you're using a standard-sized baking sheet, a roll that's around 18 inches wide should do the trick.
- Thickness: Thicker baking paper is generally more durable and less likely to tear. However, it may also take longer to heat up. If you're baking something that requires a quick burst of heat, a thinner paper might be a better option.
- Coating: Some baking papers are coated with silicone or other non-stick substances. These coatings can enhance the non-stick properties of the paper, but they may also affect the taste of your food. If you're concerned about the taste, look for uncoated baking paper.
- Heat Resistance: Make sure the baking paper you choose can withstand the high temperatures of your oven. Most baking papers are designed to handle temperatures up to 450°F (232°C), but it's always a good idea to check the manufacturer's instructions.
Step-by-Step Guide on Using a Baking Paper Roll
Now that you've chosen the right baking paper roll, let's get into the nitty-gritty of how to use it. Here's a step-by-step guide:
Step 1: Measure and Cut
The first thing you need to do is measure the size of your pan or dish. You can use a ruler or simply hold the paper up against the pan to get an idea of how much you'll need. Once you've determined the correct length, use a pair of scissors to cut the paper from the roll. Make sure to leave a little extra paper around the edges to allow for easy handling.
Step 2: Line the Pan
Place the cut piece of baking paper into the pan, making sure it fits snugly. If the paper is too big, you can trim the edges to fit. If it's too small, you may need to use multiple pieces or overlap them slightly. For round pans, you can cut the paper into a circle by tracing the outline of the pan onto the paper and then cutting along the line.
Step 3: Grease (Optional)
While baking paper is already non-stick, you may want to grease it lightly with a little bit of butter or oil for extra insurance. This is especially important if you're baking something very sticky, like caramel or toffee. Use a pastry brush to apply a thin layer of grease evenly over the surface of the paper.
Step 4: Add Your Ingredients
Now it's time to add your ingredients to the lined pan. Whether you're making a cake, cookies, or a savory dish, simply pour or place your mixture onto the baking paper. Spread it out evenly using a spatula or your hands, depending on the recipe.


Step 5: Bake or Cook
Once you've added your ingredients, place the pan in the preheated oven or on the stovetop, depending on the recipe. Follow the cooking instructions carefully, and keep an eye on your food as it cooks. The baking paper will help to protect your pan and ensure that your food cooks evenly.
Step 6: Remove and Cool
When your food is done cooking, carefully remove the pan from the oven or stovetop using oven mitts or a heat-resistant glove. Let the food cool in the pan for a few minutes before attempting to remove it from the baking paper. Once it's cooled slightly, you can gently lift the edges of the paper to release the food from the pan.
Tips and Tricks for Using Baking Paper Rolls
Here are some additional tips and tricks to help you get the most out of your baking paper roll:
- Use Multiple Layers: If you're baking something that's particularly sticky or messy, you can use multiple layers of baking paper for added protection. Simply stack the layers on top of each other before lining the pan.
- Fold and Shape: Baking paper is very flexible and can be easily folded and shaped to fit different pans and dishes. You can use it to create parchment paper envelopes for baking en papillote, or to line muffin tins and cake pans with intricate shapes.
- Reuse the Paper: If the baking paper is still in good condition after use, you can reuse it for another baking session. Just make sure to clean it thoroughly and let it dry completely before using it again.
- Store Properly: To keep your baking paper roll in good condition, store it in a cool, dry place away from direct sunlight. You can also keep it in a sealed plastic bag to prevent it from getting dusty or damaged.
Contact Us for Your Baking Paper Needs
If you're interested in purchasing high-quality baking paper rolls for your home or business, we'd love to hear from you. As a leading supplier of baking paper rolls, we offer a wide range of products to suit your specific needs and preferences. Whether you're looking for standard baking paper, natural color food baking paper, or high-quality transparent white cooking baking paper, we've got you covered.
To learn more about our products or to place an order, please don't hesitate to get in touch with us. We're here to help you find the perfect baking paper solution for your baking and cooking needs. Let's work together to make your baking and cooking experiences more enjoyable and successful!
References
- "Baking Basics: All About Parchment Paper." Food Network.
- "The Benefits of Using Baking Paper." Martha Stewart.
- "How to Use Parchment Paper for Baking." Taste of Home.